Simply put, Bulk Actions for LearnDash is the solution to manage your LearnDash content in bulk.
As your online academy grows, you add more courses, more users sign up and enroll in courses, your quizzes questions bank size increases, you need a way to manage all that in a seamless way.
Each content is unique, but they may share similar traits like points, categories, enrollment, etc.
Say, you have a course divided in two cohorts every year. As a benefit, you allow users in your first cohort to enroll in the second cohort to get access to fresh lessons, ask questions, etc.
Then you realize that each cohort has 2000 enrolled users.
How are you going to enroll 2000 students from the first cohort in to the second cohort?
Bulk Actions for LearnDash makes it easy to bulk enroll your users in a course.
Now, say a fraction of your users stopped activity after let’s say 30 days. You want to clean up your course and unenroll these users from the course.
Again, Bulk Actions for LearnDash makes it easy to bulk unenroll your users from a course. You can select users manually to be unenrolled, or select them by a condition like last activity, course final score, quiz score and more.
Assigning categories to quizzes themselves is pretty much straightforward since the quiz custom post type in LearnDash supports Quiz Categories as a taxonomy of the custom post type.
The problem arises with Quiz Questions because Question Categories are handled differently. They are not taxonomy of the custom post type, so you cannot select them with a direct approach as you would expect.
Simply put, there is no default way to add Question Categories via the Bulk Actions edit option.
The solution?
A plugin I created a couple of weeks ago called Bulk Edit Questions Category for LearnDash.
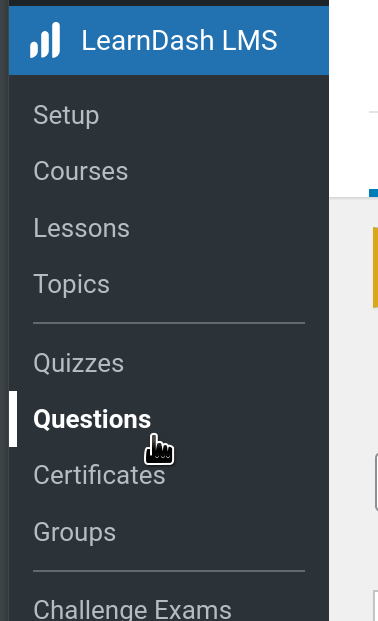
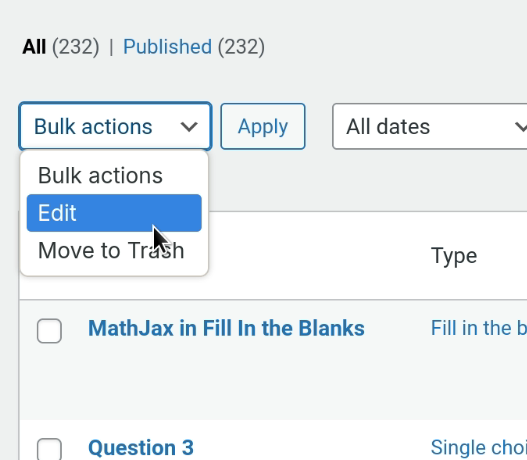
In short, after installing the plugin, go LearnDash LMS > Questions and select any questions from the list of questions.
In the Bulk Actions drop down select Edit and then click Apply.
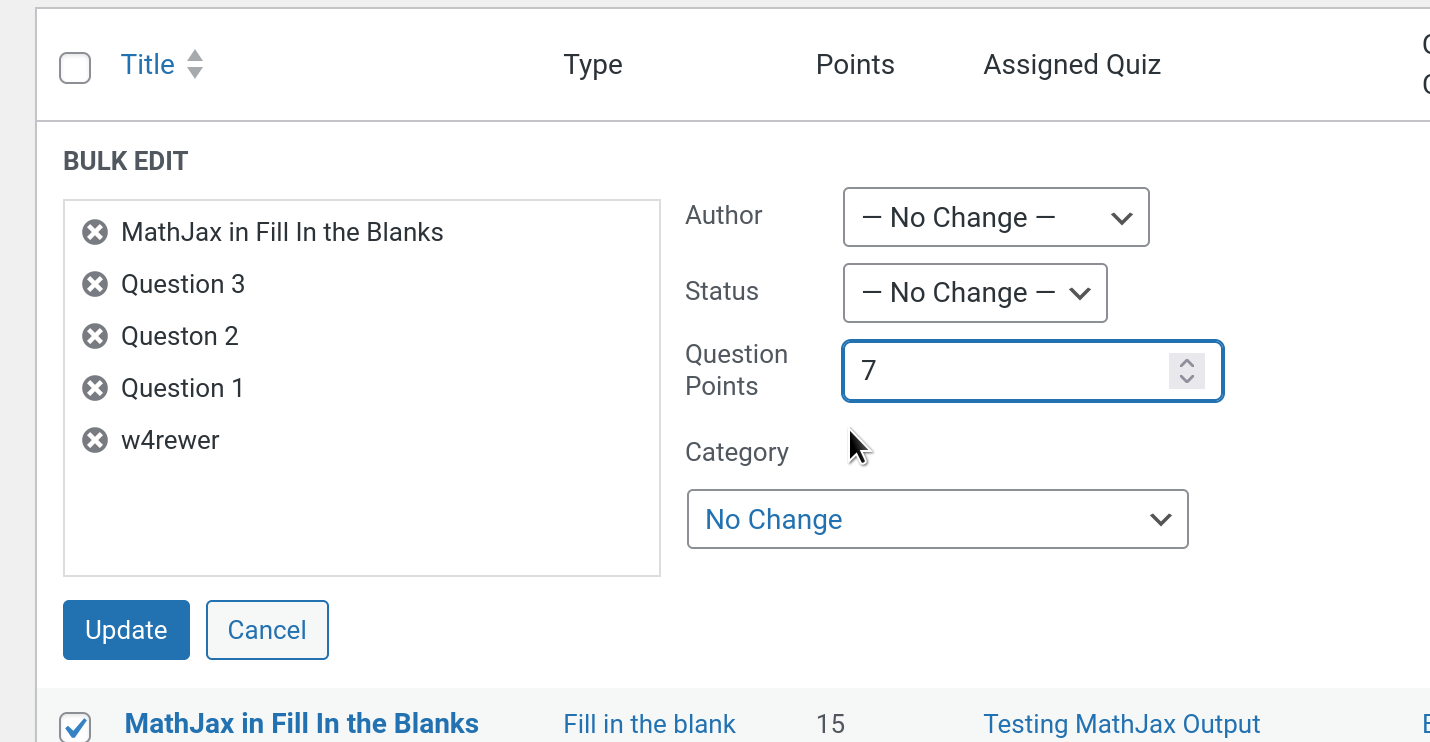
When the bulk actions panel expands, in the Category field select any the desired category you want to set for the selected questions then click the blue update button.
After the page reloads you’ll see the new category is correctly assigned to the questions previously selected.
A couple of weeks ago I came up with the idea of designing a way to Bypass Drip Content in LearnDash in an simple way on a user per user basis and that also allows the user to mark the bypassed drip content as complete.
The Problem
Drip Content in LearnDash allows you to stop users from accessing a lesson immediately after they enroll in a course and sets them to wait for a certain period of time you configure in the lesson’s settings.
But there might be a case where you want to exclude some users from the drip content rule and grant them immediate access. Let’s you have a course that sells for $97 and every lesson is available every 7 days from one another.
Then say you want to offer a premium version of it at $297 and between the premium benefits give the users full access to all lessons at once.
To bypass drip content for LearnDash right now you’d need to either do a complex setup with a CRM and an automation tool like Zapier, Pabbly, WP Fusion, or change the user’s enrollment date manually for each user.
The Solution
The plugin I came up with Bypass Drip Content for LearnDashhelps you bypass drip content on a lesson by lesson basis, picking users one by one or including users from a group at once (supports multiple groups).
Essentially, LearnDash LMS allows you to drip content by setting a release time in the Lesson Release Schedule option. You can access this option in the Lesson Settings. There are two ways to reach the Lesson Settings:
Go to Lessons in the WordPress admin and select a lesson from the list. After selecting the lesson and the lesson edit screen loads, click the Settings tab at the top left area.
Go to Courses in the WordPress admin and select any course. After selecting the course go to the Builder tab at the top menu. In the Lesson list below in the course builder, expand the Lesson you want to edit and click the Edit link.
No matter what process you choose, after selecting the Lesson, go to the Settings tab like so:
The Lesson Release Schedule option is the third option inside Lesson Access Settings:
You have three modes:
Immediately – this enables access to the Lesson immediately (no drip).
Enrollment-based. The lesson will be available X number of days after the user enrolled in a course.
Specific date – The lesson will be available on a specific date regardless of the date the user enrolled in the course. If the current date is greater than the date specified in the “Specific Date” option, then the user will be granted immediate access.
After setting the Lesson Release Schedule for your lessons, the course content is now on a drip row.
To bypass drip content, LearnDash has a filter ld_lesson_access_from__visible_after.
This filter accepts three arguments, $lesson_access_from, $lesson_id, $user_id.
$lesson_access_from – The timestamp when the Lesson becomes available.
$lesson_id – The lesson post ID in WordPress.
$user_id – The user ID in WordPress.
You can set the filter to return 0 or the output of the PHP time() function and that will suffice to bypass the drip content like so:
But what about bypassing drip content for specific users, and ignore the remaining users?
That’s where Bypass Drip Content for LearnDash comes in handy.
Sure you can do your own logic making an array of user IDs then mapping that array with the current logged in user, etc. That’s basically what the Bypass Drip Content for LearnDash does already for you.
After installing and activating the plugin on your LearnDash website, go to the Settings tab in the lesson you want to enable bypass drip content and you’ll see the following at the very bottom of the Lesson Settings screen:
Click the radio switch to Enable Bypass Drip Content.
Then you’ll see two options get expanded:
Select Users to Bypass – Allows you to select specific users allowed to bypass the current lesson.
Select Groups to Bypass – Allows you to select groups. All members of any select groups are allowed to bypass the current lesson.
When needing to make a Scrollable View in a Canva app, you can wrap the view in a Scrollable Container component from the @canva/app-ui-kit set of components.
But, let’s say that for some reason you don’t want to use the Scrollable Container provided by Canva’s App SDK, you can use an alternative with React Native Web and the ScrollView component provided by it.
To make it work, you may first need to install React Native Web if you haven’t:
The is_checkout() method is the standard to build conditionally logic around on whether the user is on the checkout page or not.
But what if it is too early for is_checkout() to be available?
Paying attention to the WordPress load lifecycle, is_checkout is available “too late” in the cycle.
It may work when called in a function hooked to template_reditect or wp_head.
If you need it before the template has loaded, is_checkout renders completely useless.
So, you need to get creative to check whether the current page is the checkout page or not.
A solution I came up with recently for a project is like so:
add_action('wp_loaded', function(){//Get the page ID from the WooCommerce option. $checkout_page_id =get_option( 'woocommerce_checkout_page_id' );// Transform the obtained string value into an integer. $checkout_page_id = (int)$checkout_page_id;// Get the Request Slug. $request_uri = $_SERVER['REQUEST_URI'];// Get the Post ID from the obtained slug. $post_id =url_to_postid($request_uri);// Compare the two IDs.if( $post_id == $checkout_page_id ) {exit('this is the checkout page'); // If the IDs match identically, then we are on the checkout page. }});
The example above uses a combination of retrieving the checkout page ID stored in the wp_options table as a WooCommerce option.
When trying to import a dump file from AIO WP Migration by Servmask, in some servers, the import stales at the import progress bar not updating forever.
This is usually related to an error 403.
Most of the times, it is a problem at the server side.
If you are using Cloudflare with the domain, you may benefit from whitelisting the server’s IP address and also your IP address in use, either your unfiltered IP address or VPN IP address.
This can be done under Security > WAF > Tools.
Screenshot credits to Dustin Hyle from Iridum Hosting.
But going back to the server side of things, you can try temporarily turning off ModSecurity while the import happens.
Remember to turn ModSecurity back on after the import is complete.
Last but not least, in very very rare cases it could be a permissions issue in the file. This can happen on the system you are using, after the file is downloaded it could be stored with read-only permissions. Ensure to set the file permissions to something workable like 755.
For your available shipping methods, you may want to add an image, text, or any other type of indicator at the farther right corner of the Shipping Method name.
You can do so with the woocommerce_cart_shipping_method_full_label filter.
This filters the shipping method full label and accepts two parameters, $label, the label of the shipping method, and $method, the actual method object.
To filter a specific method label, you can reference the method by its id.
You can access the method_id property of the method object.
Then set different cases in a switch statement covering the different methods you want to filter.
At the end, always return $label.
/** Filter the shipping method labels and add an extra text string to the right side of the method's label.** @param $label. The shipping method label.* @param $method. The method object.* @return $label. The shipping method label, whether modified or left intact.*/add_filter( 'woocommerce_cart_shipping_method_full_label', 'filter_woocommerce_cart_shipping_method_full_label', 10, 2 ); functionfilter_woocommerce_cart_shipping_method_full_label( $label, $method ) { // Use the condition here with $method to apply an image or text string to a specific method. switch($method->method_id){case'free_shipping': $label = $label .'<span>FREE</span>';break;case'flat_rate': $label = $label .'<span>Icon</span>';break; }return $label; // Always return $label.}
This is tested and works perfectly with CheckoutWC 9.0.25 (the latest version at the time of writing).
There is a problem with Elementor and CheckoutWC, and that is, when you try to edit any page in the Elementor editor, and you save a change, the CheckoutWC’s Side Cart will auto-open for some strange reason.
This problem is somewhat complex to solve as essentially, the Elementor editor lives in its own environment. This means that if you try to run a WordPress hook from the WordPress core or a third-party plugin, it may or may not work.
I found a workaround to get rid of the Side Cart auto opening when editing a page with Elementor.
It is not the most elegant solution, but hey, it works!
The logic behind it is simple: Detect if the Elementor editor exists on the current page, with JavaScript and CSS selectors. If it does, hide the Side Cart’s floating icon, drawer element, and the background overlay.
See the code below:
functioncustom_inline_script_for_elementor() {// Check if we are in the admin area and return early if we are notif (is_admin()) {return; }?><script> (function() {varcheckAndHide=function() {if (document.body.classList.contains('elementor-editor-active')) {varelementsToHideIds= ['cfw-side-cart-floating-button', 'cfw-side-cart-overlay', 'cfw-side-cart'];elementsToHideIds.forEach(function(id) {varelementToHide=document.getElementById(id);if (elementToHide) {elementToHide.style.display='none'; } }); } };// Check immediatelycheckAndHide();// Then check repeatedly for a few secondsvarintervalId=setInterval(checkAndHide, 500);// Stop checking after 5 secondssetTimeout(function() {clearInterval(intervalId); }, 5000); })();</script><?php}add_action('wp_footer', 'custom_inline_script_for_elementor');